
On this page
You need a form. Maybe it's a quote request for your website, a sign-up for a workshop or a quick survey for customers. Learning how to create an online form takes about 10 minutes. Making one that people actually finish, and that sends the answers somewhere useful, takes a little planning.
This guide shows how to make an online form in seven steps, from "what is this for?" to a test on your own phone. Each step works in any form tool, and we show how it works in HornetForms where it helps. A free planning worksheet (Word and PDF) follows the same seven steps.
How to create an online form in seven steps#
Here's the whole process on one screen. The sections below take each step in turn, so you can create a web form in the same order.
| Step | What you decide | Done when |
|---|---|---|
| 1. Purpose | What the form is for and what you'll do with each response | You can say it in one sentence |
| 2. Questions | One question for each thing you need to know | Every question has a reason |
| 3. Question types | The answer format for each question | Choices wherever you can list the answers |
| 4. Logic | Who skips what | Nobody sees a question that doesn't apply to them |
| 5. After submit | Thank-you message, endings, redirect, confirmation email | People know what happens next |
| 6. Where answers go | Email, Google Sheets, Slack, Notion, CSV | Someone sees each new response |
| 7. Test and share | A test on your phone, then the link, QR code or embed | The test log is all ticked |
Step 1: decide what the form is for#
Whether you want to build a web form for a client site or set up a form for a school trip, the first step is the same. Before you open any form builder, write one sentence: "This form lets [who] [do what], so we can [do what next]." For example: "This form lets clients ask for a quote, so we can reply with a price within one working day."
That sentence tells you which questions belong in the form, and it tells people why they should bother. Put a short version at the top of the form. Still choosing a tool? Here's how to pick an online form builder.
Then answer three quick questions:
- Who fills it in? Customers on their phones, parents at pickup and staff at a desk all need different lengths and wording.
- Who reads each response, and how fast? A form with nobody watching it is worse than no form.
- How will you know it worked? Twenty sign-ups by Friday, or fewer "what did you mean?" emails.
Step 2: pick the questions (one for each thing you need)#
A common mistake when people work out how to create an online form is asking too much. Start with a list of what you need to know, not a list of questions. The UK government's service manual puts it simply: "Before you start, make a list of all the information you need from your users." It goes on: "Only add a question if you know" a few things first, including "that you need the information to deliver the service", "why you need the information" and "what you’ll do with it" (GOV.UK Service Manual, Structuring forms, accessed 28 October 2026).
Then turn each item into one question. A few habits help:
- One idea per question. "Name and company" is two questions. So is "How was the food and the venue?"
- Cut anything you won't use. The W3C's forms tutorial says: "Only ask users to enter what is required to complete the transaction or process; if irrelevant or excessive data is requested, users are more likely to abandon the form" (W3C WAI, Forms Tutorial, accessed 28 October 2026).
- Write the question people will read. "What's your email address?" beats a lonely "Email".
- Make only what you truly need required. Every required question is one more reason to give up.
If your form is really a survey, our guide on how to create a questionnaire goes deeper on wording and order.
Step 3: choose the right question types#
The answer you want back decides the question type. GOV.UK's guidance on designing good questions notes that "Closed questions are easier to answer than open questions" (GOV.UK Service Manual, Designing good questions, accessed 28 October 2026). So use a choice question wherever you can list the likely answers, and save the blank box for stories and feedback.
| If you want... | Use |
|---|---|
| One answer from a short list | Multiple choice (a dropdown for long lists) |
| Several answers from a list | Checkboxes |
| An email address, phone number or link | Email, phone or URL |
| A date, a time or a number | Date, time or number |
| A score or an opinion | Rating, or a linear scale with labels on both ends |
| Several statements on the same scale | Matrix |
| A photo, a CV or a document | File upload |
| A booked call | Scheduling, with Calendly or Cal.com |
HornetForms has 20+ question types on every plan, including signature, ranking, matrix, file upload, scheduling and payment. That post explains when to reach for each one. Email, phone and URL questions check the answer format, so a typo gets a clear message like "Enter a valid email address".
One more tip from the W3C tutorial: "placeholder text is not a replacement for labels" (W3C WAI, Form Instructions, accessed 28 October 2026). Put the question in the label, and use the faint text inside the box only for an example. Layout, labels and error messages are a topic of their own, and form design best practices go further than this step.
Step 4: add logic so people skip what doesn't apply#
Logic is what makes a form feel short. If someone says they don't need a delivery, they should never see the delivery address question.
Write each rule as a sentence first: "If the topic is Support, show the order number question." In HornetForms, logic can show, hide, require, jump, calculate, hide the submit button or redirect, and it works on every plan. A rule can show or hide a single question or a whole page, and a jump can skip people past pages that don't apply.
Three patterns cover most forms:
- Show a follow-up. "Something else" reveals a "Tell us more" box.
- Skip a section. People who answer "No" to "Bringing a guest?" jump past the guest page.
- Add up a total. A calculated field multiplies tickets by price, or adds up a score.
For more on rules, piping and sums, see conditional logic, answer piping and calculations, explained.
Step 5: decide what happens after submit#
The moment after someone presses submit is part of the form. A plain "Thanks!" leaves people wondering if it worked, so tell them what happens next, and when. These thank-you page examples help you decide what happens after submit.
You have four tools here:
- A thank-you message. "Thanks! We'll email you a quote by the end of the next working day." Calculated values can show here too, like a rough estimate.
- Different endings. A form can have up to 20 named endings, and a logic jump can go to a named ending. People who qualify see one message, and everyone else sees another.
- A redirect. Send people to your own page, like a booking page or a download page, after they finish.
- A confirmation email to the person who answered. You write the subject and the body, and you can add a link, like a download. It needs an email question in the form, and you pick that question in the notification settings. Until you do, HornetForms sends nothing.
Good to know: set a close date or a response limit if the form should stop taking answers, and write the message people see when it's closed. A workshop with 30 seats shouldn't get answer number 31.
Step 6: send answers where you already work#
Answers that sit in a dashboard nobody opens do no good. When you create an online form, decide where each response lands before you share it.
In HornetForms, every plan can send answers to:
- Email. You can turn on an email to yourself for each new response. It starts switched off, so this is the setting people most often forget.
- Google Sheets. A new spreadsheet starts with a Response ID column, a Submitted at column, one column per question and a link back to the response.
- Slack or Discord. A message in a channel your team already reads.
- Notion. One page per completed response in a Notion database.
- CSV export. Download everything from the responses table any time. Excel export comes with Pro and Business.
- Zapier and signed webhooks. For the tools that aren't on this list.
The guide to where your form responses can go walks through setting up each one. One thing to plan for: everyone you add to your HornetForms workspace can read every response in it, so add only the people who should see the answers.
Step 7: test on a phone, then share#
Test the form the way people will use it. Most people will open your link on a phone, so start there.
- Preview it. The preview has a desktop view and a mobile view, and preview answers aren't saved. Click through every path in both views, including each page and each ending. Then tab through it with a keyboard and run down our accessible forms checklist.
- Send a real test response from your own phone. Leave a required question empty to check the message, and type an email address with a typo. Try each logic rule from step 4.
- Check the after-submit steps. Did the thank-you message, ending or redirect show? Did the email to yourself arrive? Did the row land in Google Sheets?
- Ask one person who has never seen it to fill it in. Watch where they slow down.
Then share it. Every HornetForms form gets a link, with a custom slug if you want a tidy one. The Share tab makes a QR code (PNG or SVG) for posters and handouts. Our guide to printing a QR code for a form has more on where to put it.
Wondering how to create a form for your website rather than a link? Embed it inline, as a popup, as a slider or as a full page. That works on any site that lets you paste HTML or add an embed block; your site builder's help page shows where. The guide to embedding a form on a website walks through each option.
Want to know which place brought in the most answers? Add a source to each link you share, like ?utm_source=newsletter. HornetForms shows UTM source, medium and campaign in the built-in analytics and on each response, and our guide to capturing UTM parameters in a form covers the details.
Prefer to write the markup yourself? Our guide to HTML form code has starter forms you can copy.
Plan it on paper first: the free worksheet#
If you're planning how to create an online form for a team or a client, put it on paper first. The free online form planning worksheet (Word) follows the seven steps above, one section per step. You get a purpose line and a question table (what you need, the wording, why, and whether people must answer). Then come question type tables, a logic table, an after-submit checklist, a table of destinations and an 11-row test log. Grey rows show a filled-in example for a design studio's contact form.
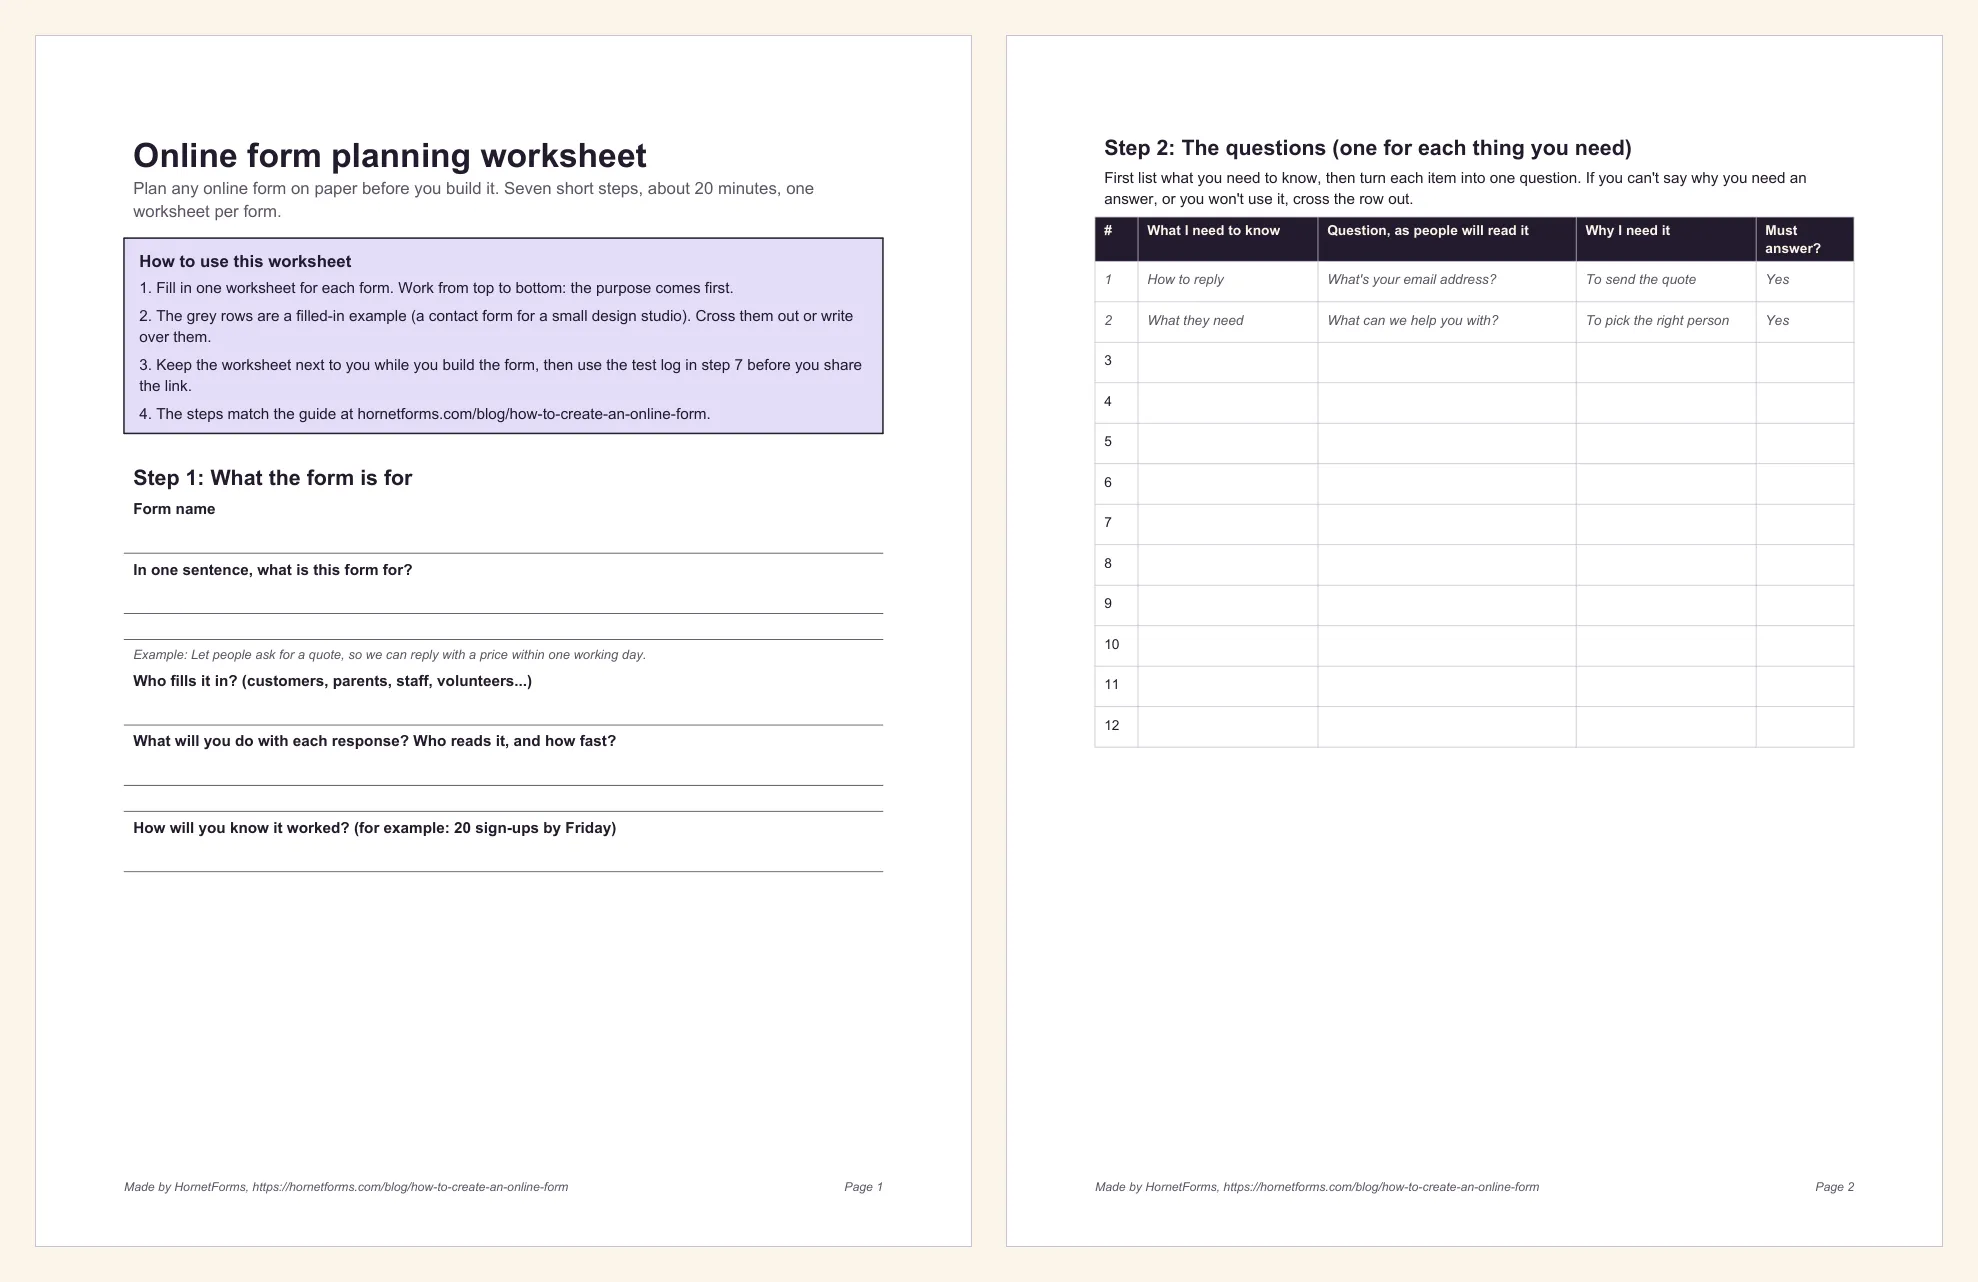
Prefer to print it? Get the planning worksheet as a PDF (US Letter) or the A4 PDF. Fill in one copy per form. It takes about 20 minutes and saves a lot of "wait, why did we ask this?" later.
How to create an online form for free#
How do you create a form without paying? You don't need to pay to create an online form that works. HornetForms is free forever on the Free plan, with no credit card to sign up and unlimited forms and unlimited responses within fair use. The steps above (question types, logic, endings, redirects, notifications, Google Sheets, Slack, Discord, Notion, CSV export, QR codes and embeds) all work on Free. Respondents never need an account to answer.
There are three ways to start without a blank page:
- Describe it. Type what you need, like "a quote request form for a cleaning business", and the AI builds a draft for you to edit. The Free plan includes three AI generations a month.
- Import what you have. Got the form as a PDF or Word file, and want a fillable form online instead? The AI rebuilds it as an online form for you to review (one AI generation per file, up to 10 MB). A list of questions in a CSV file imports for free.
- Start from a template. More on that below.
Pro and Business add your logo, a cover image, custom CSS and no "Made with HornetForms" badge. A custom domain comes with Pro (one) and Business (10). The pricing page has the full list. If you've used Google Forms before, here's how Google Forms and HornetForms compare, and what to do when your form hits a response limit.
Sticking with Google Forms for now? Here's how to make a Google Form, step by step.
Start from a template#
A template gives you steps 2 to 5 already done: the questions, the types, the logic and the thank-you message. You swap in your own wording and do steps 6 and 7 yourself. Starting from a form you already hand out on paper? Our guide to turning a paper form into an online one walks through it.
Good places to start:
- The contact form template has a topic dropdown, so you can see at a glance who should reply.
- The event registration form template asks for a registration type and shows the dietary question only to guests joining the dinner.
- The customer satisfaction survey template asks the CSAT and NPS questions and scores them for you.
- The lead capture form template ends with a thank-you screen that points people to their inbox.
For more ideas, see 10 form templates to steal this week and our list of website form examples for the forms every client site needs. Worried about junk responses once the link is out? Every form has spam protection that doesn't annoy humans.
Build your first form today#
Write the one-sentence purpose, list what you need, and pick the type for each question. Add logic, plan what happens after submit and turn on the email to yourself. Then test it on your phone before anyone else sees it. That's how to create an online form people finish, and you can do it in an afternoon. Sign up for free and build your first one today.