
On this page
A form is often the first thing a new customer fills in for you. If it looks like every other default form, it doesn't feel like yours. The good news: learning how to customize Google Forms is quick, and most of the settings live in one panel.
This guide covers how to customize Google Forms from top to bottom: theme color, background, header image, fonts, a shorter link and the message people see after they answer. Every Google Forms step comes from Google's own Docs Editors Help pages, quoted with Google's button names. We checked those pages on November 2, 2026. Google changes its menus now and then, so the linked page always has the latest version. At the end there's a free brand checklist to fill in before you start.
What you can customize in Google Forms#
Google's theme page opens with one line: "To tailor your form to your audience, you can add a theme or change the font" (Google Docs Editors Help, Change the theme or font of your form, checked November 2, 2026). Here's what Google's help pages describe when you want to know how to customize Google Forms, and where each setting lives.
| What you change | Where Google puts it | What Google's help page says |
|---|---|---|
| Theme color and background color | Customize theme, under "Color" | "you can choose a theme color and background color for your form" |
| A color of your own | Customize theme, Add custom color | "To add a custom color, click Add custom color" |
| Header image | Customize theme, under "Header" | "To add your own photo as a theme, under 'Header,' click Choose image" |
| Fonts | Customize theme, under "Text" | "you can change the font style for headers, questions, and text" |
| A shorter link | Share (after you publish) | "You can copy a short link once you publish the form" |
| Confirmation message | Settings, under "Presentation" | "You can customize the message people get after they submit the form" |
That's the whole list on the pages we checked. So the quickest way to customize Google Forms is to work down this table in order, then test the result on your phone.
Build a branded form in HornetForms#
If you'd rather start in a builder made for customer-facing forms, here's the same job in HornetForms, step by step. The features page has the full list.
- Pick a starting look. The Design tab has 9 theme presets and 21 fonts. Start from the preset closest to your brand.
- Set your own colors. Type your brand colors in. The Design tab warns you when a color is hard to read, so you can fix it before anyone sees it. It flags text or button text below 4.5:1 and buttons below 3:1 against the form background. It's a warning, not a block.
- Choose the layout. Keep one scrolling page, or turn on "One question at a time."
- Shape the details. Set Corners (from None to Extra large), the form Width (Narrow, Normal or Wide), Input style (Outline, Filled or Underline), Input size and Button size, Button style (Solid or Outline), Button alignment, and a Light or Dark Appearance. All of these are on every plan.
- Add your logo and a cover image (Pro and Business). Custom CSS is there too on the same plans, if your team writes it.
- Rename the buttons. Each page's button text can say what happens next, up to 50 characters. "Next" is the default.
- Write the thank-you screen. Build it from headings, text with links, lists, images, dividers and embeds such as Calendly or a YouTube video. Type @ to pipe in an earlier answer, like the person's first name.
- Tidy the link. Give the form a custom slug, and get a link preview and a QR code (PNG or SVG) on every plan. On Pro and Business, put the form on your own domain with automatic HTTPS.
- Remove the "Made with HornetForms" badge (Pro and Business).
The Free plan is free forever, and people answer without an account. The pricing page shows which plan includes each step above.
How to customize Google Forms: theme and colors#
Google's steps for the theme are short (Change the theme or font of your form, checked November 2, 2026):
- "In Google Forms, open a form."
- "Click Customize theme."
- "Optional: Under 'Color,' you can choose a theme color and background color for your form."
- "To add a custom color, click Add custom color."
- "Click Close."
Google adds: "You can view your new theme and continue to edit your form." Use Add custom color for your brand's exact color rather than the nearest swatch. Have the hex code ready (like #1F4E79) before you open the panel. The checklist at the end has a line for each one.
A tip from us: pick one strong brand color for the theme and keep the background quiet. Busy backgrounds make questions harder to read on a small screen.
Add a header image (and crop it)#
The header is the banner across the top of the form. It's the biggest brand moment on the page, so it's a good place to start when you learn how to customize Google Forms for a client. Google's steps for adding one (Change the theme or font of your form, checked November 2, 2026):
- "On your computer, open a form in Google Forms."
- "At the top right, click Customize Theme."
- "In the 'Theme' side panel, under 'Header,' click Choose Image."
- Pick where the image comes from. Google lists Themes, Upload, Photos, Google Drive, Google Images and By URL.
To fix the framing afterwards, Google's page says: "Click the header image" and then Reposition Header Image. Then "To crop the image, drag the corners of the box" and "Click Save." To swap it out later, click the header image and choose Replace Header Image.
Our advice for the image itself:
- Keep the key part in the middle. Put your logo or the main subject near the center, so a tight crop still shows it.
- Don't put the only copy of important words in the image. Some people use screen readers, and small text in a banner is hard to read on a phone. Say the important things in the form title and description too.
- Check it on a real phone after you crop. Open the form link on your own phone and look at the top of the page.
Change the fonts#
Fonts sit in the same panel. Google's steps: "Click Customize theme." Then "Below 'Text,' you can change the font style for headers, questions, and text. Choose the text style you want to edit, then change the font and size." Finish with "Click Close" (Change the theme or font of your form, checked November 2, 2026).
When you customize Google Forms for a brand, pick the style closest to your brand's font. Then use it the same way everywhere: one style for headers, one for questions and body text. Two fonts is plenty. Size matters as much as the style. Small, light text is the first thing people squint at on a phone.
Get a shorter link#
A long form link looks messy on a flyer or in a text message. Google's sharing page covers the short version (Publish & share your form with responders, checked November 2, 2026). First, publish: "At the top right, click Publish." Then, to get the link, "At the top right, click Share" and Copy responder link. Google's tip: "You can copy a short link once you publish the form." Click the box next to Shorten URL, then click Copy.
Put the short link wherever your customers already look: your email signature, your booking page, a QR code on the counter. Our guide on how to make a QR code for a form shows how to print one and test it.
Change the confirmation message#
The confirmation message is the last thing people read, so make it useful. Google's steps (Publish & share your form with responders, checked November 2, 2026):
- "Open a form in Google Forms."
- "At the top of the form, click Settings."
- Next to "Presentation," click the Down arrow.
- "Next to 'Confirmation message,' click Edit."
- "Enter your message."
- "Click Save."
A good confirmation message answers three questions: did it work, what happens next, and when. For example: "Thanks, Sam's Bakery got your order. We'll email you by 5 p.m. tomorrow to confirm the pickup time." For more lines to copy, see our thank you page examples.
Make it look like your brand (and keep it readable)#
Brand colors that look great on a logo can fail on a form. Light gray text, white text on a yellow button and pale field borders are the usual problems. The W3C's accessibility guidelines give clear numbers to check against (W3C, Web Content Accessibility Guidelines (WCAG) 2.2, W3C Recommendation, checked November 2, 2026):
- Text: 4.5:1. Success Criterion 1.4.3 (Level AA): "The visual presentation of text and images of text has a contrast ratio of at least 4.5:1." Large text needs "at least 3:1." WCAG defines large text as "at least 18 point or 14 point bold."
- Controls and graphics: 3:1. Success Criterion 1.4.11 (Level AA) asks for "a contrast ratio of at least 3:1 against adjacent color(s)" for the parts you need to see to use a control, like a field border or a checkbox.
- Never color alone. Success Criterion 1.4.1 (Level A): "Color is not used as the only visual means of conveying information."
- Logos are exempt. "Text that is part of a logo or brand name has no contrast requirement." Your logo can stay as it is. The questions around it can't skip the check.
Here are a few pairs we worked out with WCAG's contrast ratio formula, so you can see where the line falls:
| Text color | Background | Ratio | Passes 4.5:1 for normal text? |
|---|---|---|---|
#333333 (dark gray) | #FFFFFF (white) | 12.63:1 | Yes |
#767676 (mid gray) | #FFFFFF (white) | 4.54:1 | Yes, just |
#999999 (light gray) | #FFFFFF (white) | 2.85:1 | No |
#FFFFFF (white) | #F5B83D (amber) | 1.78:1 | No |
#1A1A1A (near black) | #F5B83D (amber) | 9.78:1 | Yes |
#FFFFFF (white) | #1F4E79 (navy) | 8.66:1 | Yes |
The takeaway: a bright brand color often works as a fill with dark text on it, not with white text. Our accessible forms checklist covers the rest of WCAG 2.2 for forms, and form design best practices covers layout, labels and buttons.
Good to know: Write your colors down as hex codes before you customize anything. It's much easier to check contrast, and to match the same colors across your form, website and emails, when you have the exact codes in one place.
When you want more control#
Once you know how to customize Google Forms, you'll see how far the theme panel takes you: a color, a header, fonts and a message. That's enough for many forms. If your form faces customers and you want your own layout, your logo or your own domain (logo and domain on Pro and Business), the HornetForms steps above cover those. Our Google Forms vs HornetForms post compares the two job by job, and the guide on how to make a Google Form covers the build itself, from questions to responses.
Free form brand checklist#
The free form brand checklist (PDF, US Letter) puts everything in this guide on two pages. It's also in A4.
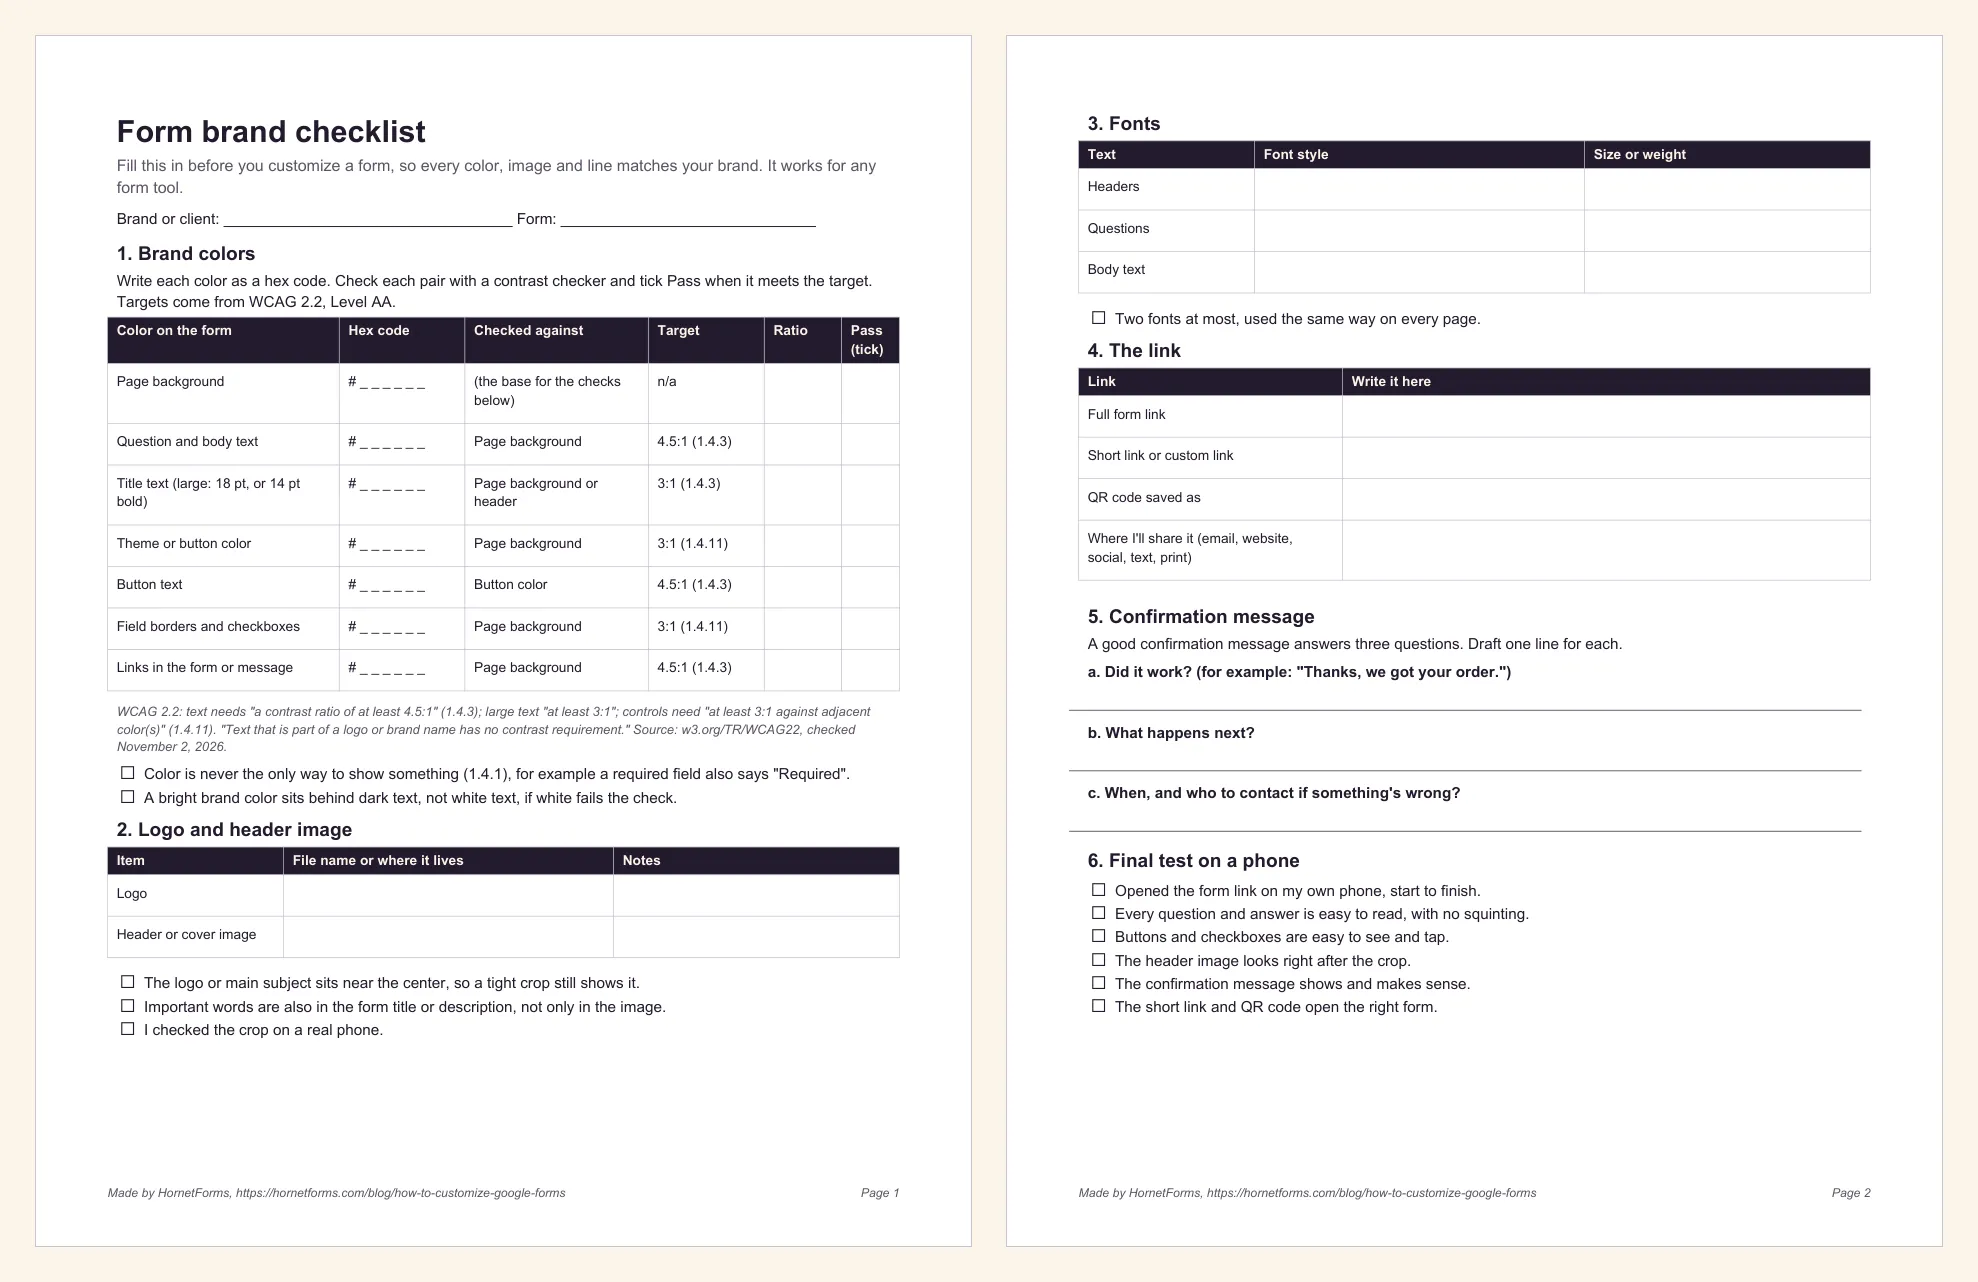
Inside you'll find:
- Brand colors: a table with a blank hex field for seven colors on the form, what to check each one against, its WCAG 2.2 target and a pass column.
- Logo and header image: where the file lives, a crop check on a phone, and a tick box for repeating key words in the form text.
- Fonts: one line each for headers, questions and body text.
- Link: the full link, the short or custom link, the QR code file and where you'll share it.
- Confirmation message: space to draft it against the three questions (did it work, what next, when).
- Final test: six checks to run on a phone before you send the form out.
It works for any form tool, not only Google Forms, so fill it in once and keep it for every form you build.
Make your next client form look like yours#
Now you know how to customize Google Forms: set the theme color, add and crop a header, pick fonts, shorten the link and rewrite the confirmation message. Then check every color pair against WCAG's numbers. If you build forms for clients or customers and want your own layout and link (plus your logo on Pro and Business), sign up for free and build your next intake or order form in HornetForms.
The small print#
Google Forms, Google Drive and Google Workspace are trademarks of Google LLC. HornetForms is not affiliated with, endorsed by or sponsored by Google. Steps quoted from Google Docs Editors Help, checked November 2, 2026; for current details, check Google's help pages.